
Porsche 996 Rear Spoiler
I recently fixed my spoiler concern on the weekend. I'm reviving this bond, just in case other individuals of you are experiencing similar problems. IF YOU SHOULD BE IN SAN ANTONIO OR SURROUNDING AREAS AND ALSO YOU NEED ASSIST DOING THIS _ CALL ME - i shall help you - 210-240-5464
My spoiler was raising on both sides, nevertheless motorists part was lagging, it was only approaching about half means. Most of the posts i possibly could find stated that the culprit had been that hydraulic substance features released from 1 part (the pump has 2 seperate resivoirs, one for every single ram). But there was clearly no 'easy' way to include liquid, and so the dealer quoted 1800 to repair the situation (change the complete system).
I read everything i possibly could get a hold of about the subject - here, earth porsche, 6 rate on line. The genereal concensus was that when it had been raising on both edges, it was simply a minimal liquid amount issue. I typically then followed the instructions and fixed it within 2 hours. Below are a few pointers.
Firstly, this is simply not difficult, Im an accountant, we do not alter personal oil or have special resources. I do like to tinker just a little, mostly electronic devices. When you yourself have a 'lagging' side on your spoiler (however it raises on both, at least only a little) - YOU CAN EASILY FIX THE. Only open the deck cover and sit with a chair. Glance at the within the deck lid - you will see a shrowd that addresses many everything, a cooling lover, the rams the spoiler, plus some lines (my own is a turbo, thus I have a bit more your regular 996). Once you look at this, you will see that it is not rocket science, it litterally takes 10 minutes to take the system out (or at the least where you can access it). It really is no big package.
Most compose ups mention eliminating the complete system and placing it on a work bench. Then, hooking an external 12 v energy source towards the product to improve and lower it. I DIDN'T DO THIS - there is no need. We left the machine when you look at the vehicle, and filled it here. i used the ability from the vehicle to lower and boost it, nothing more. I don't know the reason why any person would pull it our, you've got enough space to do all that you need to do.
I'll say that it's useful to have a coule of small tables, a chair, and 'magic device'. The secret tool is a unique device which meant to turn the cylindes that hook up to the wing it self. I will publish an image, We purchased online for possibly 30 dollars. It performed help. In addition, yo require some hydraulic substance, individuals have listed different things, but i would suggest purchasing something which has a leak preventer with it. There are lots of choices at the car parts shop, we went with a transmision fluid/lub with leak preventer.
Removal/access associated with the device -
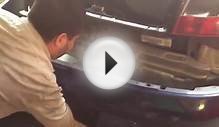
First - take-off the wing it self. This can be quite simple - only raise the wing (using automobile power) to access the material cylinders that hold it up. In the event your wind will nat boost sufficient, you may have to have somebody pull it up using one part to get to the cylinders. I recomment making use of several towels involving the vehicle as well as the spoiler becoming safe (no scratches, etc).
Once raised, you must utilize turn the cylinders about 3/4 a turn CLOCKWISE to release the wing. We utilized the secret tool, but Im nearly possitive you can do this with your hand. The tool mkes it much easier, since it is designed to fit the bend associated with cylinder and has a metal protrusion that meets to the opening to grasp the cylinder. Whenever you turn one side, that side pops down, others is a lot easier, and wing is down. Studying the struts after the wing is removed, these are generally very easy to change, so there is not any be concerned about all of them not-being oriented properly later on for re-attachment. Start the deck cover and move on, I would lower the struts currently (using option in-car). Now, cover the whole motor with 1 - 2 towels, to help keep it clean, have somewhere setting stuff withour stress from it dropping.
You must take down the big hard plastic piece that addresses almost all of the inside the deck cover. You DO NOT have to unbolt the lover from this unit - leave it in place. It is attached to the huge synthetic address (shrowd) and will remain affixed. Also, there is no need to unplu the cables (braking system light, etc). If you want to - understand your self out, I did not.
From the right-side (to my turbo) there clearly was an air vent or tunnel that nourishes environment to the airfilter. This removes with 2 bolts within (as it is open) top right-side of this atmosphere tunnel, then it pops out of place regarding the straight back side. The same size bolt can be used in about 8 places to keep the plastic cover/shrowd in position, simply take them completely. As soon as these are all out, the whole installation is free. It really is easily fit in tightly, but you can wiggle it and slip it down seriously to access the pump (and rams) simpler. Push it down 6-8 ins (sliding it level agains the deack top, to the motor). If it generally does not move, you've got missed a bolt.
As soon as this really is free, change to the torque sockets and remove the rams. I recommend taking a photo which means you know-how the hydraulic range is oreinted entering the ram (it links at the bottom). In addition, each is marked (L or R). Pay attention to in which this level is - which means you place it in equivalent place. It might just fit one way, but be aware.
As soon as the 3 torque bolts tend to be eliminated, the ram pulls quickly from the decklid.
Simply set it on towels regarding motor, or let it dangle for now. Get rid of the other ram, set it up on engine as well. In top center of shrowd, over the fan, tend to be 4 nuts (curved limit searching peanuts) that connect the cylinder/pump/oil ressiviour into the shrowd. Remove these 4 nuts, this may permit you to eliminate the pump. Following the peanuts tend to be removed, pull the shrowd out of the decklid only a little, and slide the create. You ought to be in a position to stand the power up on its end over the towels since the engine. Its slightly tight, but there is however plenty of room/ size on cables to allow for this. You wish to put the end associated with pump that has the hydraulic lines coming into it pointing up (aided by the pump itself in a verticle place resting in the towels). Just take a photo for the end for the pump - noting the orientation for the outlines, etc.
I did so this on my own, so I did not have you to definitely hole the pump directly, or even the outlines up, etc. It would be better to have somebody repeat this for your needs. The things I performed had been usage 2 zip ties for eac region of the pump. We utilized the center, top 2 holes on shrowd, and looped 1 zip link through this opening and zipped it in order to make a huge secure tie (big circle). Then I connected a second zip wrap into the pump and through very first ZIP wrap. We repeated on the other hand and tighted. Thus giving myself 2 loops (linked like a chain) on each side the holds the pump straight up. When I place a moment zip tie-on each part (in the shrowd) to make use of later to hold within the outlines.
To fill the machine, you are not planning take away the lines from rams. The rams by themselves try not to hold much substance (whenever down - maybe not extened). Ensure the rams tend to be down - maybe not extended!
INTERESTING VIDEO

Share this Post
Related posts

Porsche 997 rear spoiler
Look inside the motor compartment in the right-side. It is additionally vital to locate the wiring use from stock decklid…
Read More
1996 Porsche Targa for Sale
Such drawbacks have existed because the introduction for the initial Targa 31 years back. In September of 1993, Porsche ended…
Read Morelatest post
-
 Electric Porsche 356 July 10, 2026
 -
 1998 Porsche 993 C2S for sale July 5, 2026
 -
 Denver Porsche dealership June 30, 2026
 -
 Porsche Design Aviators June 25, 2026
 -
 Porsche Cayman Dimensions June 20, 2026
 -
 Silver Porsche Boxster June 15, 2026
 -
 Porsche Cayman facelift June 10, 2026
 -
 Porsche Panamera s for sale June 5, 2026
 -
 Porsche Panamera Wiki May 31, 2026